Technique - Powering Panasonic DC-GH5 via the mains with a DIY-dummy-battery
Digital photocamera's have become ever more versatile devices since their introduction and the number of functions is still increasing.
One thing has remained the same: they all work on batteries and the wish for longer runtimes is as old as the invention of the battery itself.
Most cameras these days either feature a dedicated input or USB connection to power the device via the mains.
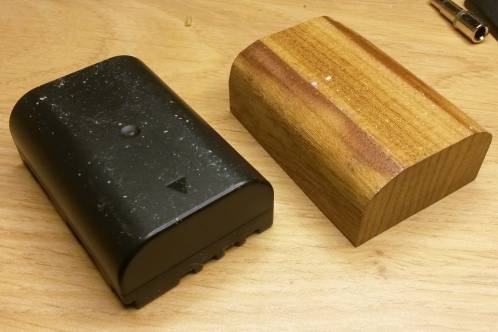
The Panasonic DC-GH5 (in short: GH5) relies on a somewhat older principle, namely the dummy-battery, most likely to keep the weather-seal intact.
The dummy-battery goes into the batterycompartment, but has a wire that goes to the outside world for connection to a (sold seperately) mains power supply.
In this article, I will make such a dummy myself and choose my own supply. Because, what's better than running the risk of frying my GH5? Exactly. This is all done at your own risk!
Do I need this?
Maybe not. As a photocamera, the GH5 has a good runtime. But if you want to make a time-lapse or (as is so usual these days) want to shoot video with it, you'll find out that it's just a photocamera. The battery will drain quickly and you'll keep exchanging them, (The reason videocamera's still have their fair share of fans). Than, a dummy-battery provides a nice solution.
I want to, but...
I also wanted to have a dummy-battery, as I was going to use the camera as a 'super' webcam. As I like to mess about with this myself, I was not going to buy the dummy, but make it myself. That's not easy and more work than buying one, but it comes with a few advantages...
Dimensions of the battery
 First hurdle to tackle was the dummy itself. The dimensions equal the DMW-BLF19E batteries, but the shape isn't easy.
By sheer coincidence, I found a table leg in the wood-bin at work that almost exactly matched the curved sides of the batteries. Besides, it was also a tough type of wood that hardly splintered. Perfect to craft the dummy from!
The tablesaw was used to get a piece of it exactly down to size. The beltsanding machine took care of the rough curves, which I refined with a file. An advantage is that you don't need to create all the special ridges found on the battery, that are only used by the charger.
The second hurdle were the contacts itself. If you have fiddled with contacts yourself before you probably also know that most metals are prone to oxidation or dirt and greasy fingers.
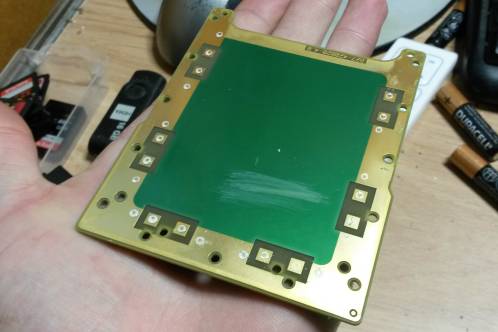 The batteries of one of my videocamera's have gilded contacts, but good luck finding that yourself.
But, I knew where to find an old PIN-terminal and had already seen part of the PCB was gilded. The PIN-terminal was opened up (very interesting as well by the way) and proved to have a wealth of gilded PCB inside.
With the calliper, I took the dimensions of an original Panasonic battery. Take care of course that you don't short anything with such a nice metal tool!
You see the dimensions in the drawing below, all sizes in millimetres. Sizes in italic are approximate.
Other remarks: the data-contact is only used by the charger and isn't even present inside the GH5 and thus not necessary on the dummy. The 10k resistor between ground and negative can be an 1/8th of a Watt. Without this resistor, the camera won't accept the dummy at voltages below 8,4 Volt!
Crafting it
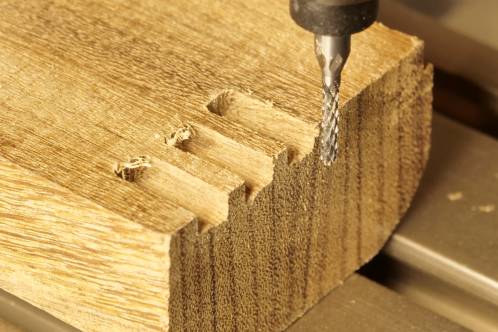 After checking that the dummy slides in and out of the GH5 without getting stuck, some milling has to be done to mount the contacts. With my Proxxon and some unknown mill-bit and the compound table this was a piece of cake.
The wood itself did prove to be extremely tough. I had to mill in 3 passes to prevent overloading the Proxxon and milling produced extremely fine dust.
The picture clearly shows I'm milling deeper than the drawing states, as I have to take the thickness of the PCB into account.
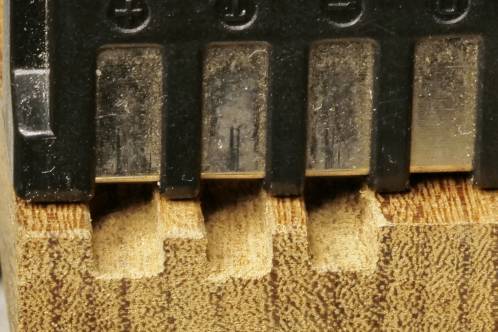 A quick check: Yep! I'm spot-on there.
 The drawing does not show the slit I had to mill on the other side of the dummy to provide a way of soldering a connection to the contacts, just like I had to drill quite a deep hole.
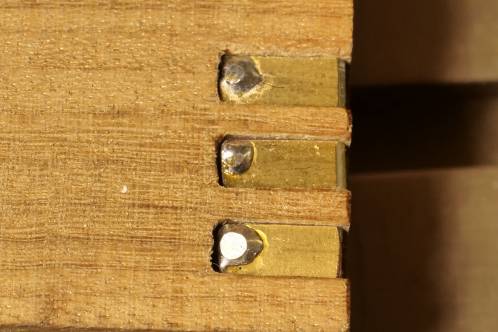
After sawing 3 pieces of PCB, they were made to fit by filing them carefully. Don't forget a small diagonal edge on the contacts so the contact-fingers inside the camera catches them nicely.
After making them fit, the pieces of PCB were put inside the milled slots. With a small drill, I went through the PCB and the wood completely, until it would exit the wood on the other side.
Pieces of brass wire put in to bring power to the other side. The pieces of wire were bent 90 degrees so it would hold the pieces of PCB in place.
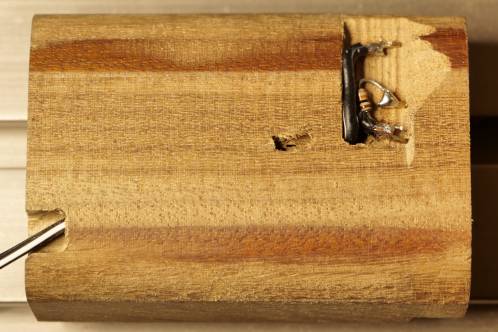 With a drill of something like 4 millimetre I first drilled my way to the slot on the other side to be able to feed a cable through to the contacts. Unfortunately, the drill found it's way outside of my piece about halfway through. Ah well, it works.
Keep into account that the wire has to exit the dummy at the same spot as the special hatch on the GH5 and the hole thus has to be at the right spot.
A resistor between the ground and negative terminal, a piece of cable from the junkbox and a female DC-jack (5,5 x 2,1 millimetre), were soldered together and: done!
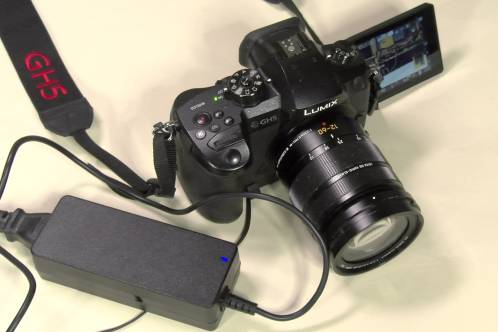
A mains supply
The only thing still missing is a mains power supply. I use a Mean Well GST40A07-P1J, which is a 7,5V 5,3A switchmode power supply. Every switchmode power supply delivering 6,5 to 9 Volts with a current rating of about 3 Amps should be sufficient, but no guarantees: the peak-currents drawn by the GH5 are intense and if a supply can't respond to it quickly, it will just shut down.
 Your camera will think it works on batterypower and show a battery-indicator on screen (that's what the resistor is for). A serious dip in voltage could make this indicator fall, but it won't recover!
This because the camera only knows draining batteries (as it can't charge them in-camera). You run a risk a second drop eventually does cause it to shut down.
The advantage of building the dummy yourself: you can choose how long the cable will be. I always have the greatest laughs when I see people who take videos with these devices a lot, mess about with all kinds of extension-leads and adapter-plugs because the original cable is just a tad short or doesn't fit.
I'm also surprised it works out so well (or maybe I falsely think so), as the risk of malfunctions greatly increases with all those extra connections. When you have a videocamera, you don't have to put up with that bullshit.
The second advantage is that you're not tied to the (rather pricey) power supply provided by Panasonic, which is (of course) superfuckingfancy.